

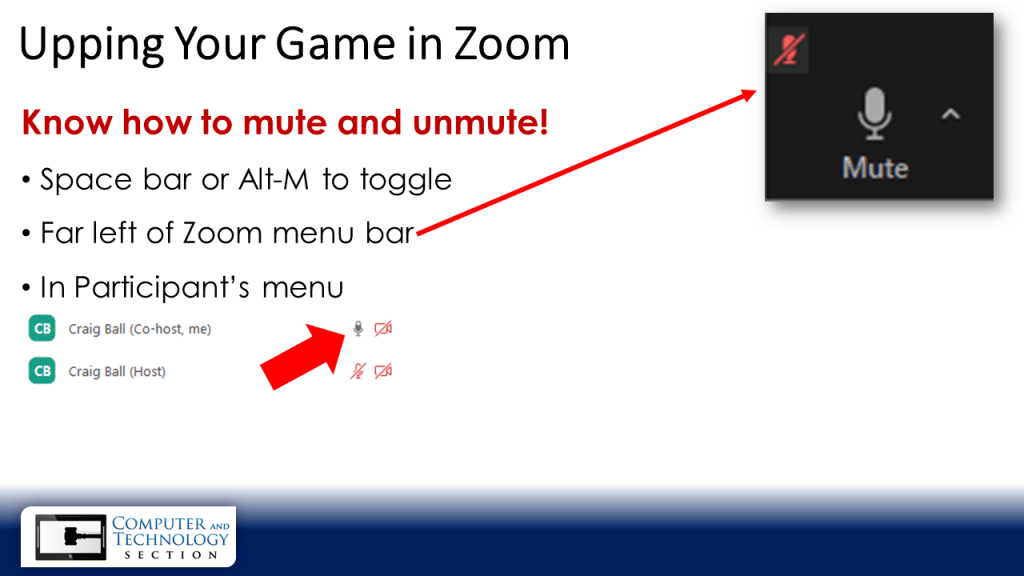
I lately presented a program for the State Bar of Texas Annual Meeting alongside Texas District Court Judge Emily Miskel. Like everything else, the venerable Annual Meeting was recast as a virtual event. Our topic was “Upping your Game in Zoom,” and we spoke of many ways to improve the quality of online video meetings and hearings. Judge Miskel and I covered dead simple ways to avoid common errors and some advanced techniques. One advanced approach I shared was making your presentation visuals serve as your dynamic Zoom background, enabling a presenter to interact with background visuals in the same way that TV meteorologists explain weather patterns using a green screen map.
There are times when a disembodied narration of screen-filling visuals is best; yet, there are times when you don’t want to force viewers to choose between speakers and visuals, as occurs when Zoom attendees lack the screen real estate or mastery of the Zoom interface needed to pin speakers to larger windows. Let’s face it: most Zoom users are overwhelmed by mute/unmute; asking them to pin and resize screens is a bridge too far.
Certainly, anyone can share a PowerPoint presentation in Zoom, bringing slide imagery to the fore and relegating speakers to tiny squares at the perimeter, like the world’s saddest episode of The Brady Bunch. Instead, I wanted to be a more prominent part of the show, akin to the accustomed ways speakers present onstage.
Television news anchors routinely uses “OTS” (for over-the-shoulder) graphics as an effective segue between the newsreader and story video. OTS graphics work nicely in Zoom, introducing the topic or bullet points in a background slide, then sharing out the focal graphics. It sounds complicated, but it’s easy to get the hang of going to and returning from shared screens. It takes practice, but isn’t practice always key to improving presentation skill?
PowerPoint does all the heavy lifting of converting your slide visuals to still images (and even to video) suitable for use as Zoom backgrounds. Any PowerPoint slide show can be saved as individual JPG or PNG graphics. The “trick” is to compose the slide to afford room for the presenter’s upper torso without obstructing the visuals.
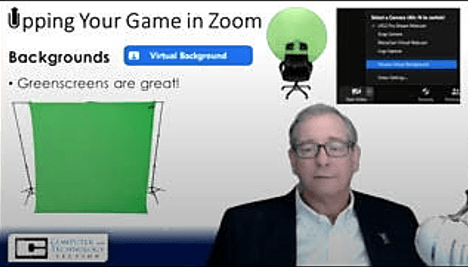
If you look at the two images below, you can see that I’ve left vacant the lower right quadrant of each slide. This presentation required use of templates, but left to my own aesthetics, I never use templates.

In practice, I adjust my camera such that my head and shoulders occupy the lower right of the Zoom screen (see below), then I can point at bullets and gesture at graphics. The weathercaster technique really shines when you present standing up. Then, you’d devote one-half to one-third of the slide layout to your graphics and the balance to you. You could even stand between two columns of bullets, Of course, this requires sufficient room between camera and green screen and, ideally, a dedicated camera and studio lighting.
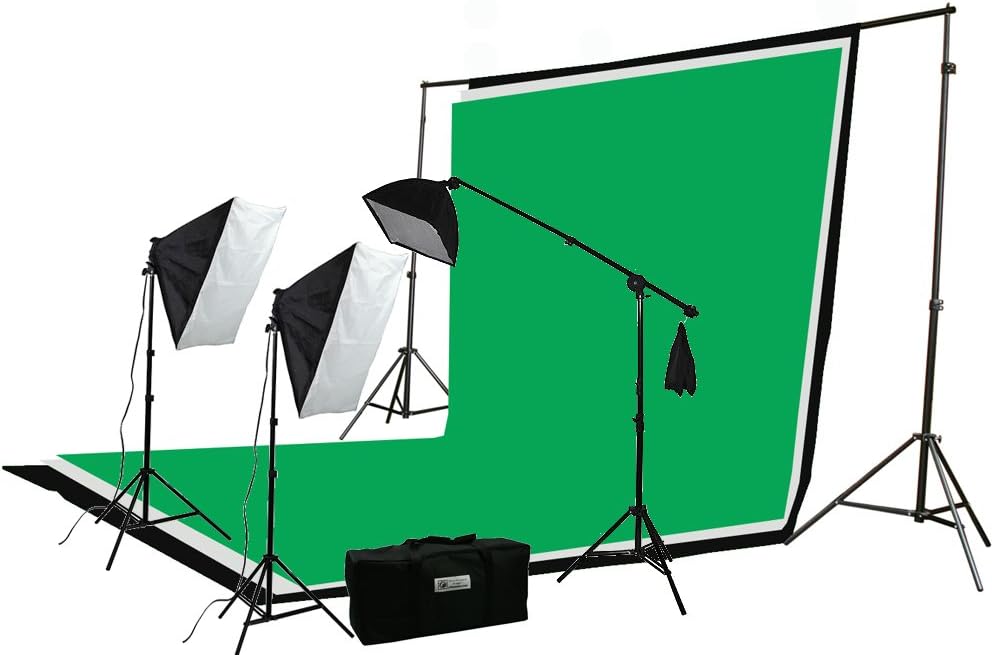
By now, you’ve gathered that achieving a true chroma key effect requires a physical green screen backdrop, not the virtual “where’d my ears go?” background effect often seen. A suitable 9-10′ muslin green screen backdrop will cost about twenty dollars on Amazon. I elected to spend more and get the green screen, crossbar, pair of backdrop supports and a bevy of studio lights and stands for $150.00. If you’ve got a way to hang a green sheet behind you (e.g., curtain rod, tacked to a wall, hung from the ceiling), that twenty dollar backdrop works just fine.
Having created your background visuals and saved each slide as a still JPG or PNG image, you’ll load them into Zoom as Virtual Backgrounds. To do so, start Zoom and go to Virtual Background in the Settings menu. Locate and click the the small plus sign (+) (Arrow 1, below), then click on “Add Image” from the menu and navigate to where you’ve saved your background images. Add each image in this manner, keeping them in the order in which you want them displayed when presenting. Next, click the box to tell Zoom you have a green screen (Arrow 2), and finally, be sure the color shown matches your backdrop. Zoom should do this automatically, but you can also set it manually (Arrow 3).

You’re ready to go, but before starting a presentation, launch Zoom and Virtual Background again. Practice selecting each background much as you might advance them as slides in a PowerPoint show, choosing them in succession while presenting. If you’ve loaded them in your preferred order, they will appear as options in that order. You will need to keep the Virtual Background settings panel open at all times during your presentation, so a second screen helps insure the settings panel doesn’t disappear behind another window. You don’t want to be fumbling around in search of the Virtual Backgrounds panel while speaking.
The Weather Map Technique is harder to describe than it is to pull off. The key to keeping it smooth and simple calls to mind the out-of-towner visiting Manhattan who asked a local, “How do I get to Carnegie Hall?”
The answer’s the same: “Practice, practice, practice!”
Wish List: I look forward to a day when Zoom natively supports dynamic backgrounds allowing us to feed PowerPoints directly to a background instead of a shared screen. Also, I’d like to be able to folder backgrounds topically. Affording hosts greater control over the layout of Zoom windows would be nice. In Zoom hearings, think how it would help to be able to group lawyers according to their role in the litigation.

Pingback: Advanced Zoom “Weather Map” Technique
Pingback: Socha’s Weekly Trend Report – July 2020 #2 | Association of Certified E-Discovery Specialists (ACEDS) – JD Supra – The Data Privacy Channel
Pingback: A Videoconferencing Guide for Oklahoma Lawyers | Law Practice Tips
Pingback: A Videoconferencing Guide for Oklahoma Lawyers | Legal Tech Monitor
Pingback: A Videoconferencing Guide for Oklahoma Lawyers | Legal Tech Monitor | Mainstage