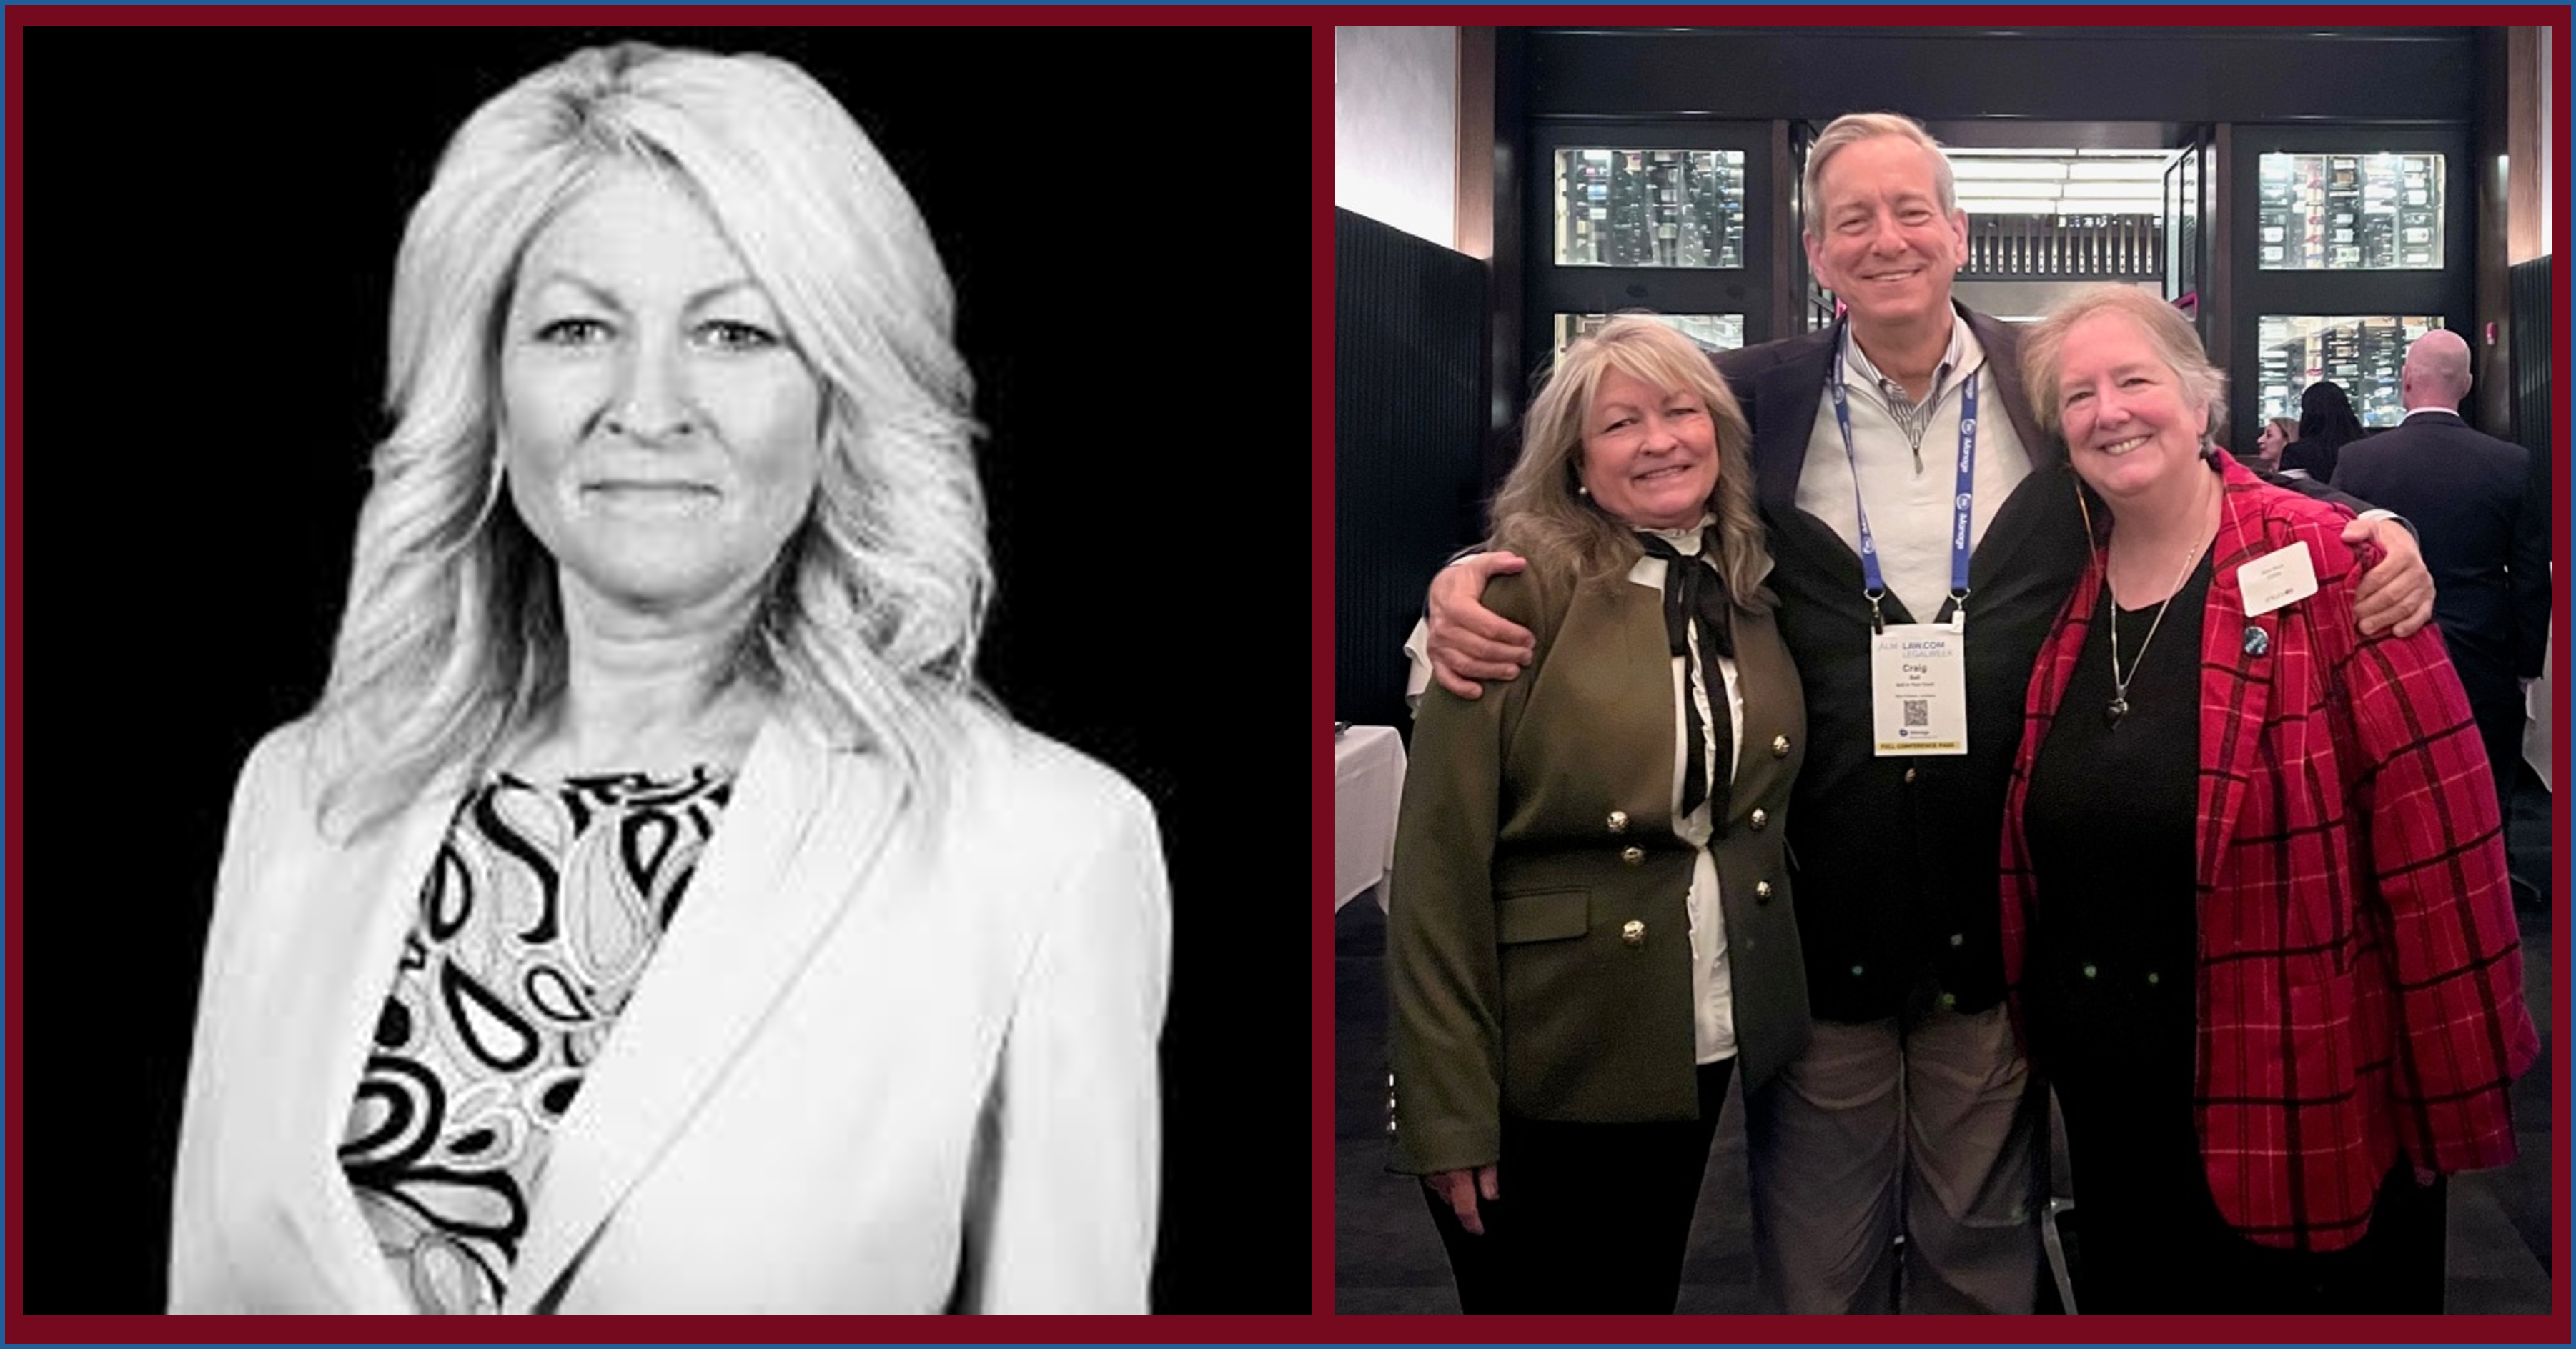
This post isn’t about forensics or e-discovery, but you can hardly be expected to focus on ESI if you’re sweltering in a hot house! Having lived most of my years in the balmy American South and Southwest, I regard air conditioning as essential; yet like water and electricity, air conditioning garners little thought until it stops working. Recently, I explained the mechanics of air conditioning to a curious friend, and it made me see that grasping the fundamentals of air conditioning is more than just a useful academic exercise; it’s a skill that can spare you discomfort and even save significant sums. If nothing else, you’ll understand what an A/C repair person does and maybe recognize when you’re being conned.
I handle much of my own A/C maintenance and repair although I deal solely with the electrical components and leave the pressurized parts to professionals. It’s not that pressurized components are terribly difficult to service, but doing so carries additional risks to person, property and the environment, and requires access to specialized tools and the correct formulation of refrigerant gas, the latter sold only to licensed service personnel. Most often, “fixing” my central air conditioning system entails no more than blowing out drain lines, cleaning coils to improve thermal transfer and occasionally replacing a starter capacitor or contactor relay. None of that is rocket science, but still, undertake electrical repair only if you know how to do so in safety!
The ABCs of A/C
Let’s spend a minute on thermodynamics and put names to the major components of a cooling system.
Air conditioning is extracting heat from interior air and transferring (“exchanging”) that heat to exterior air. In so doing, moisture in the interior air condenses on cold surfaces lowering interior humidity, helping the interior to feel still cooler because our bodies cool better when air is drier. The heat exchange process entails a pair of separate, connected coils of tubing over which a pair of electric fans circulate air. The cold coil inside the house is called the “Evaporator” and the hot one outside is called the “Condenser.” In the U.S., these coils contain a hydrofluorocarbon (HFC) gas serving as a “Refrigerant.” For many years, the most common refrigerant was branded as Freon®, so most still refer to air conditioning refrigerants that way.
Refrigerants are gases at normal pressures and temperatures but become liquids when compressed. If you’ve ever sprayed compressed air to, e.g., clean computer components, you may have noticed how the nozzle where the compressed air emerges gets quite cold or even freezes. The process where a compressed liquid expands to a vapor or where a vapor becomes a liquid when pressurized is called “Phase Transition.” Think of compressing a gas to liquid as pushing heat out and its expansion from liquid to gas as pulling heat in.
The compression and expansion of the liquid/gas refrigerant in the coils and connective tubing is the work of two more components: a “Compressor” and an “Expansion Valve.” The compressor receives the expanded gaseous refrigerant and pressurizes it into a liquid state liberating its heat energy and pushing it through the condenser coils to carry that heat away. In central air conditioners, the compressor sits outside the home, typically surrounded by the condenser coils and surmounted by a large fan circulating air over the hot condenser coils to disperse that heat to outside air. The condenser coils travel through many thin metal fins serving as heat sinks, increasing the surface area over which the fan blows air to better disperse heat.
As the cooler, compressed liquid refrigerant leaves the condenser, it travels through copper tubing and enters the evaporator coil (usually located in an attic, basement or utility space) via the expansion valve regulating the flow of expanding refrigerant as it vaporizes. This expansion chills the evaporator coil and a second blower fan circulates filtered air over the cold evaporator coil drawing heat from the interior air. The warm, humid air traversing the evaporator coil leaves water on the coil like beads of sweat on a glass of iced tea—falling into a collection pan and draining to the sanitary system or outside.
Finally, and familiarly, the operation of the fans and compressor is controlled by an adjustable, temperature-sensing switch called the “Thermostat.”
Here’s a helpful infographic courtesy of the U.S. Department of Energy:

What Can Go Wrong?
If your A/C system fails because it’s lost refrigerant, that’s your worst-case scenario. Apart from a repairable puncture of a refrigerant line by a nail or screw during construction or another freak occurrence, refrigerant leaks typically stem from deterioration of the coils and tubing as a result of corrosion. When that occurs, your system is dead or dying and only a professional can help you. Too, rarely can they do much in the way of repairs short of replacing leaking components and recharging the system at great cost.
But coolant loss is not the most common reason A/C systems stop working, and you should be certain all quick, cheap fixes are considered before letting anyone sell you a replacement coil or system.
In my experience living in communities where 100° Fahrenheit (38°C) temperatures are commonplace, central air conditioners most often stop cooling properly because:
- A clogged drain line trips a float switch;
- A starter capacitor has dried up; or
- A dirty coil has caused a thermal limit switch to trip.
Of course, there are other things that go wrong, and I respect you enough, Dear Reader, to elide over causes like the circuit breaker has tripped or the thermostat is set to heat. In medicine, there’s a wonderful diagnostic metaphor that counsels, “When you hear hoofbeats, think horses, not zebras.” Here, too, consider the most common problems before deciding that the compressor has shorted out or the Freon in your system is now parked somewhere over the North Pole.
Clogged Drain Line: All that water that drips from the cold evaporator coil has got to go somewhere and most of us prefer it not come down through the ceiling. So, there are usually two drip pans below the evaporator. The first, inside the A/C unit, tends to emerge via a short length of PVC drain line connected to a float switch, an aptly-named electrical device that turns off the A/C unit when a clogged drain line causes water to back up and “float” a switch to break a circuit. The second is an external drain pan that serves as a failsafe when the main drain clogs AND the float switch fails. This external pan should remain dry at all times, so it’s being dry signifies nothing respecting the primary drain line and float switch. Clogged drain lines tend to manifest as the frequent cycling of the A/C such that the system doesn’t run long enough to cool the house. In my homes, clogged lines tended to be caused by debris, mold or insects that blocked the line. I resolve this by locating the standing riser (a short, often-capped, vertical piece of PVC in the drain line near where it exits from the inside air handler) and blowing or vacuuming it out, then flushing the line with vinegar or a diluted bleach solution. I sometimes clear the line by blowing into the tubing using just my lung power, but I don’t recommend it as safe or satisfying.
Start Capacitor Failure: We all know how hard it is to move a static load (like a broken down automobile) and how much easier it becomes once it gets moving and you have the benefit of momentum. When an A/C compressor or fan motor starts, it lacks momentum and must draw a heavy load of electrical current to get going. A/C compressors and fans employ a start capacitor holding an extra “kick” of current to get things spinning without tripping a circuit breaker. Over time, and particularly in very hot weather, capacitors lose their ability to deliver the surge of power needed to start the compressor or fan motor. To the uninitiated, a bad capacitor presents just like a failed compressor, except that a replacement capacitor costs a few dollars whereas replacing a compressor runs to thousands of dollars.
Swapping out a bad start capacitor is dead simple and dirt cheap, but it requires that you take essential safety precautions including turning off power at the circuit breaker AND physically removing the A/C safety disconnect switch located at the condenser unit. Also, be careful to note that the capacitor being replaced may store enough power to deliver a jolt, so don’t touch or short its terminals. Often an aging capacitor and compressor can be rejuvenated by installation of a so-called “hard start kit,” a $10.00-$15.00 device that piggybacks on the existing capacitor and ensures sufficient start current to kick over a reluctant compressor.
Rather than supply the step-by-step of a capacitor replacement or hard start kit installation here, permit me to point you to countless Youtube videos on the topic. The DIY parts are readily available on Amazon and again, safety first!
Dirty Coils: Coils are heat exchangers and anything that impedes thermal transfer, including dust, dirt, debris, corrosion on the coils, serves to diminish the system’s ability to shed heat and cool efficiently. If the system can’t shed heat, it may overheat and trip a thermal limit switch shutting the compressor down or causing it to “short cycle” erratically. Accordingly, it’s important to only run your A/C system with air filters in place and to periodically hose off dirt and debris from the fins and coils of the exterior condenser unit. For most systems, an annual rinse should suffice.
With luck, the fixes outlined above will ensure you keep cool and spare you needless service calls and expense.